I had no idea what vertex painting was or how to set it up before attempting this task.
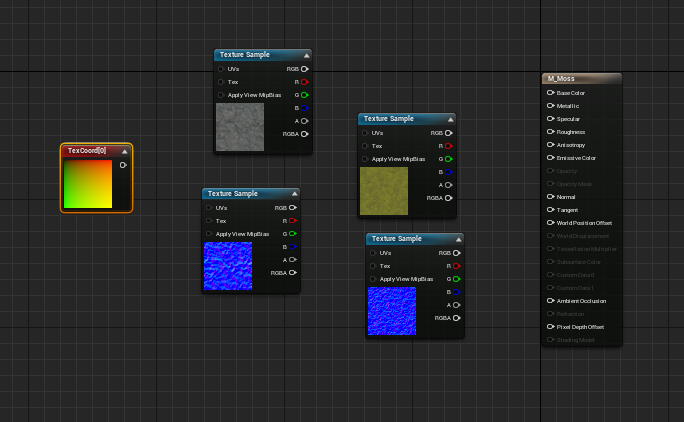
I chose a rock as my object to attempt vertex painting on. Therefore, for the materials, I chose a rock and a moss material.
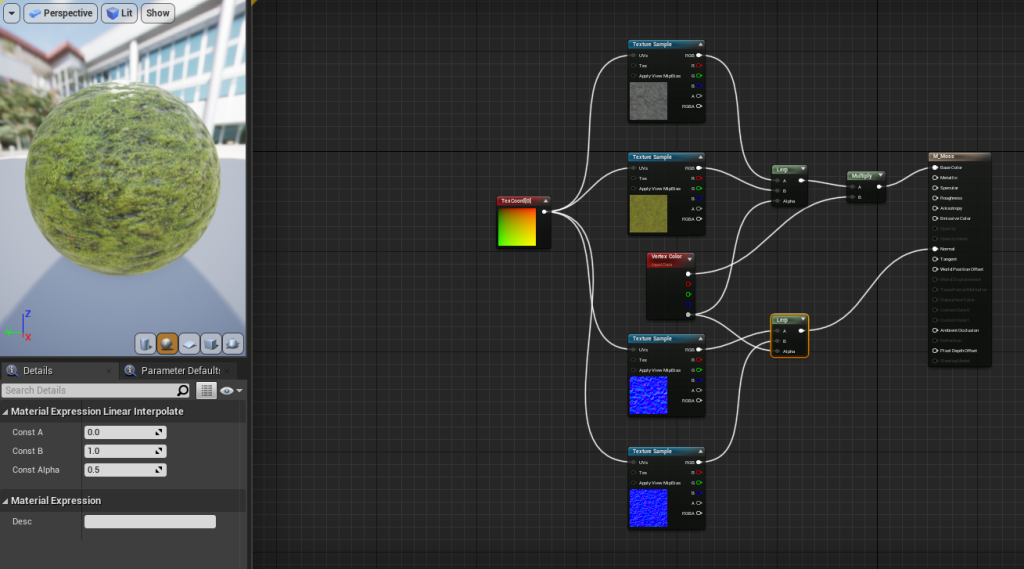
I followed the guide on how to arrange a two way texture material setup. One thing that always confused me when I first started using Unreal is the need for both the coloured and blue texture sample for each material. I now know that the blue one is the normal map of the texture.
The lerp node blends the two texture samples together and outputs it to the base colour and normal respectively.
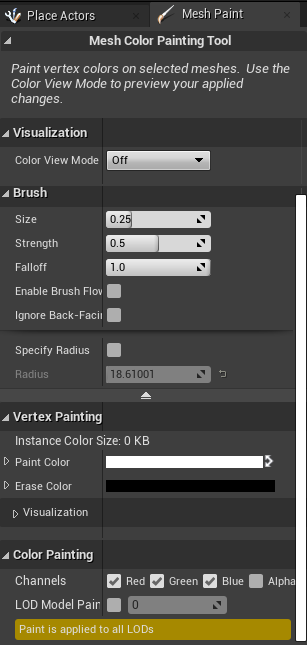
Once I had completed the setup, I attempted to start painting. However, I could not find the weight painting category. It turned out that I was under the colours section the entire time.

Once I had figured out that there were different categories at the top, I quickly became amazed at how much more life vertex painting can add to an object. It can be used to give an object more of a story in a scene by painting on little details such as blood or moss.
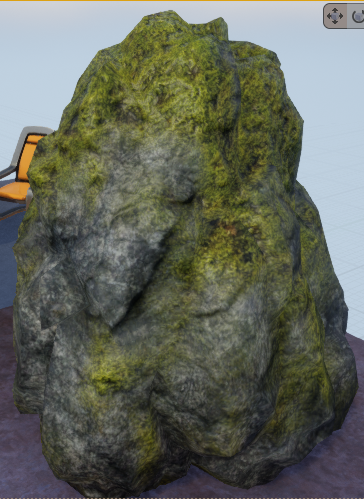
I was also impressed at how I could switch between the moss and the rock with ease, allowing me to correct any mistakes if I added too much moss for example.
Overall, vertex painting is a very useful skill to know that will help me improve my assets and environments in the future by adding more depth and story to them.