Decimation:
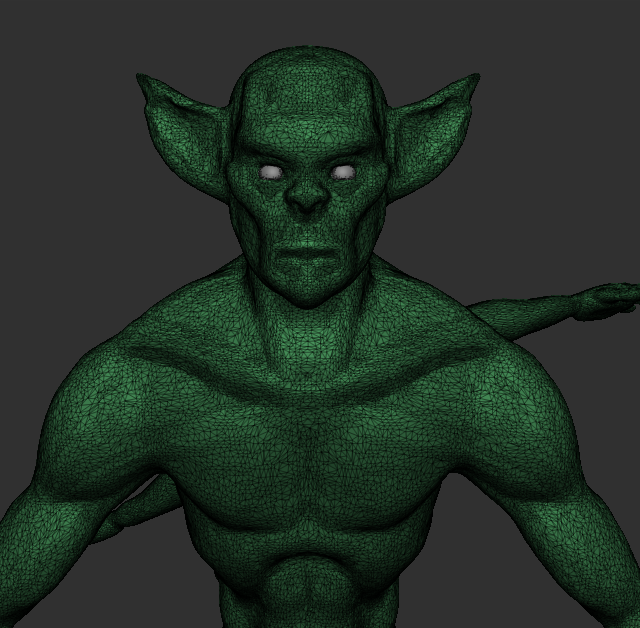
Before I could retopologize in Maya, I first needed to decimate my model. This is due to the sheer amount of polygons my model contained and the fact that Maya would perform poorly with anything over one million.
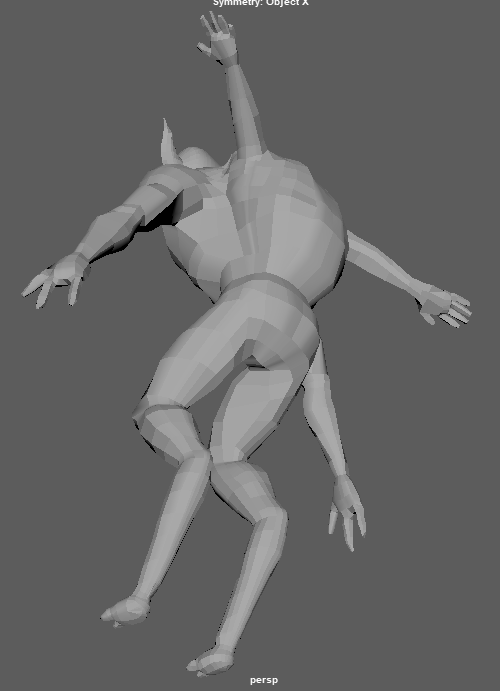
So, I used the Decimation Master in ZBrush to take my model from the millions down to around 200k polys. Decimation Master is really powerful as if 200k was too high for me I could just adjust the decimation percentage and it would instantly change the amount of polys within my model.
The problem with decimation and why this cannot be used as the low poly model is that all of the polygons are now triangles – making it practically impossible to create a UV map for it.
Retopology:


Once the model had been imported to Maya and made live, I could use the Quad Draw tool to start retopologising. I started off by creating large squares as if you start off small then you’ll be stuck at that level the entire time and it’ll take ages to do the whole body.
Thankfully, I realised fairly early on that I had forgotten to turn on symmetry.
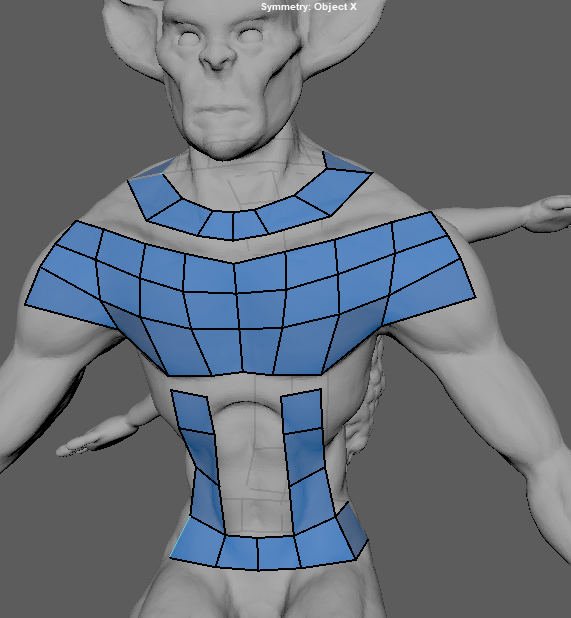
So, I redid what I had done but this time with symmetry on. My model was tricky in this regard as most of it is symmetrical apart from the arms at the back which I will have to turn off symmetry to retopologise.
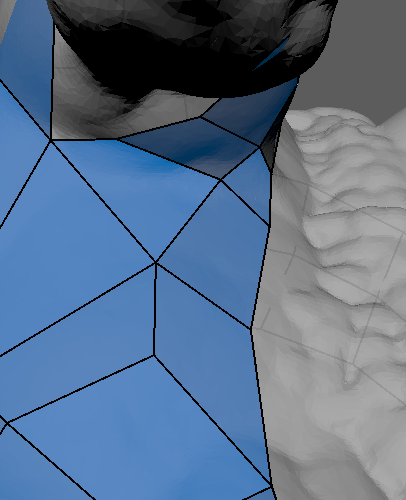
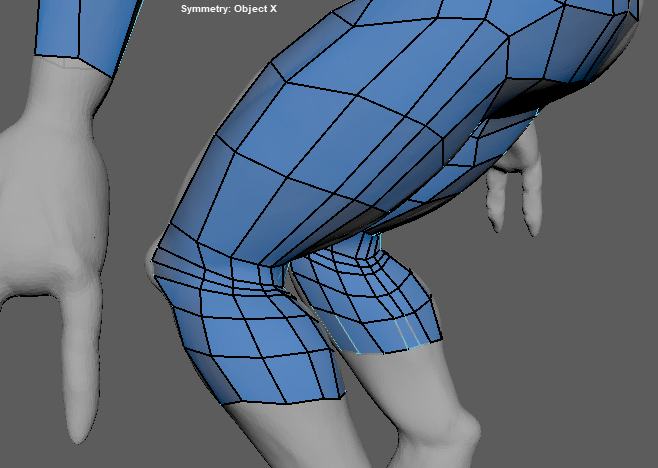
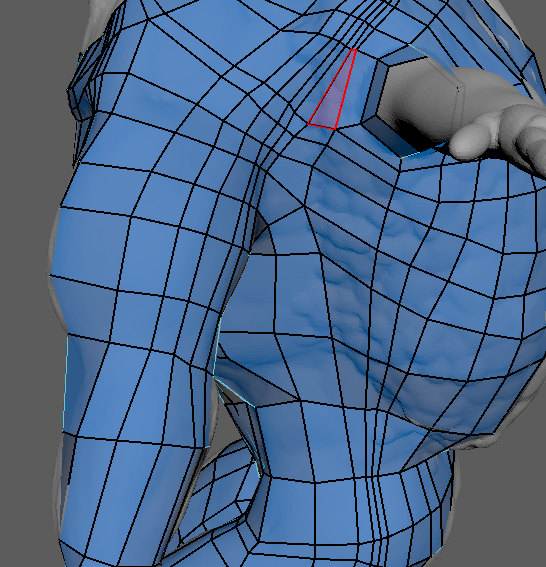
This is known as a “star” according to FlippedNormals as it is five lines connecting to one point. Whilst they should be attempted to be avoided, sometimes you just cannot avoid them. Instead, you can put them in places that are unimportant to the viewer anyway such as underneath the armpit, like this example.


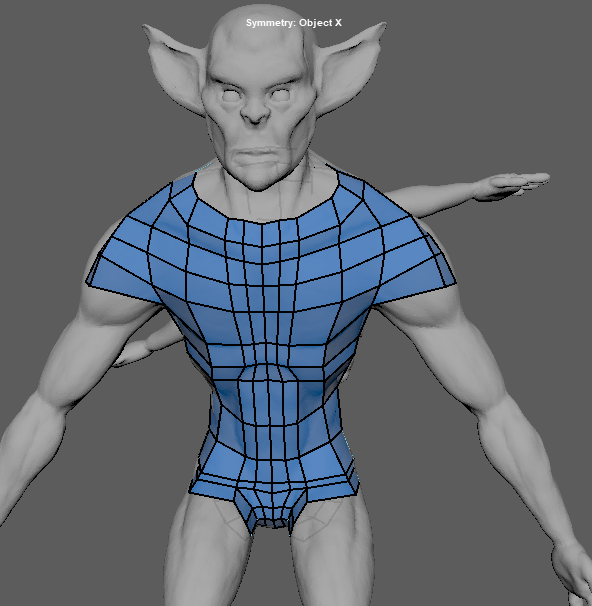
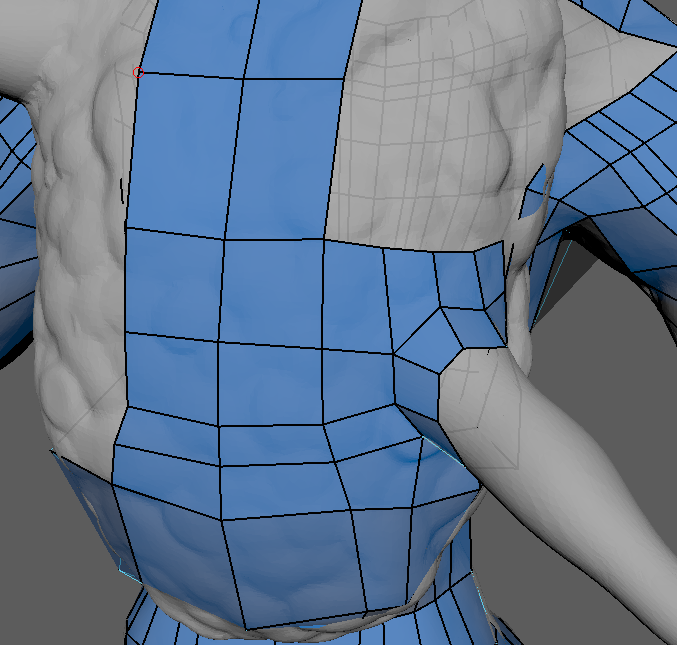
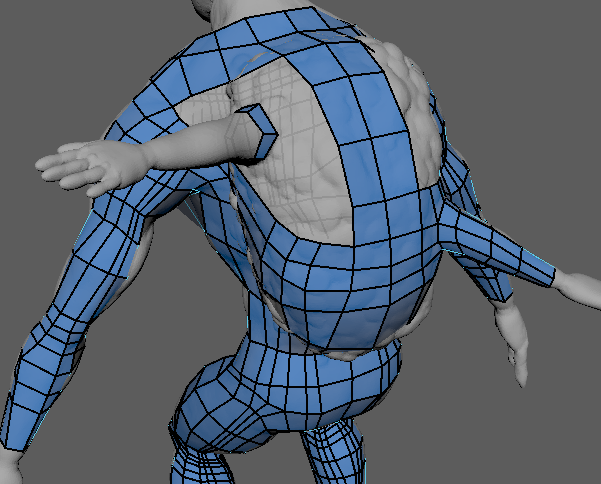
I was fairly happy with how the front and back had turned out so far as the topology was fairly clean and the squares were still large enough for everything to not get convoluted.
As mentioned earlier, I left the area around the arms for now as that requires asymmetrical retopology.
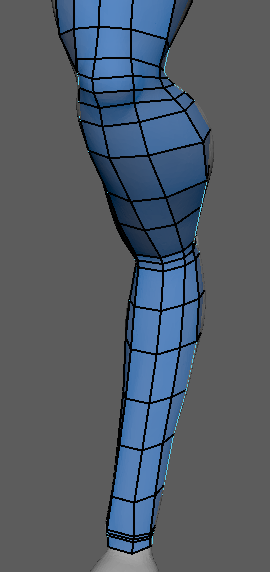
The legs went fairly smoothly and I made sure to add extra topology and edge loops around any joints such as the knees as that is where the mesh will deform the most when animating.
Now it was time to focus on the arms. I first created a ring of topology around the arm and then tried to, as neatly as possible, join the surrounding topology to it. Both arms went surprisingly smoothly in this regard, although it was a pain having to do the same thing twice due to them not being symmetrical.

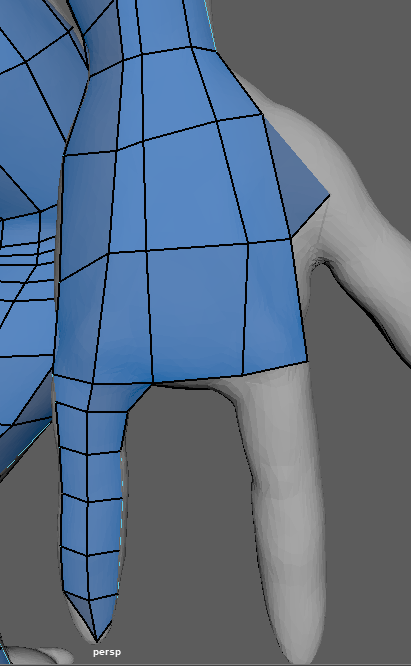
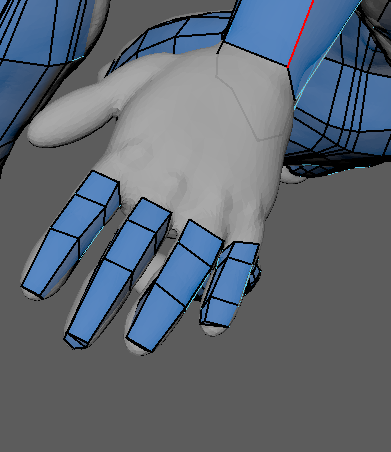
To create the hands I created loops for the fingers and then tried my best to connect them to the hand. The hands overall were definitely the biggest challenge when retopologising, especially the five fingered hands. A huge obstacle to overcome was the Maya camera when trying to retopologise small spaces such as between each finger. Eventually, though, I managed to complete the hands despite the camera difficulties.
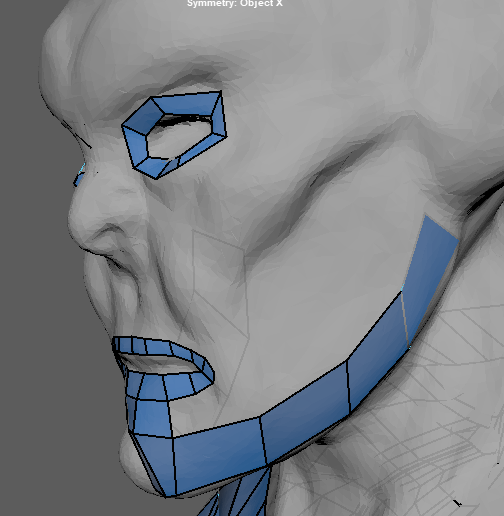
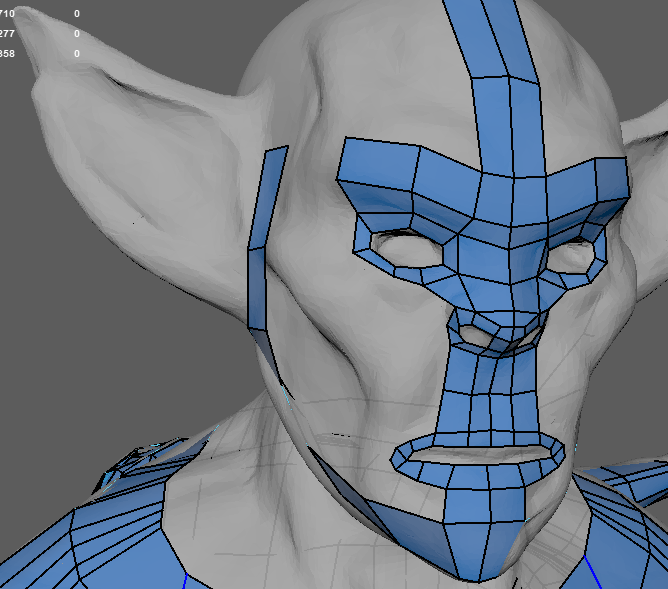
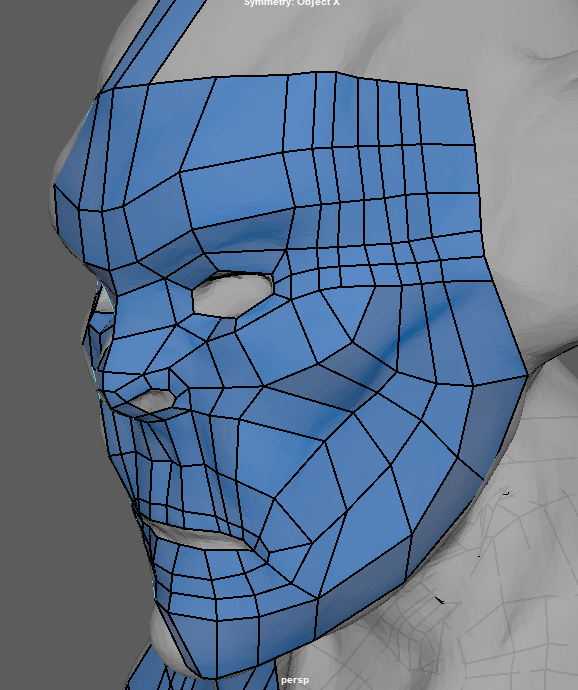
To start the head, I blocked out the key areas such as the eyes, nose, mouth and jawline and then began connecting them together. Again, the most important thing here was to keep it simple at first with large squares to make it easier to connect everything in a smooth and flowing manner.
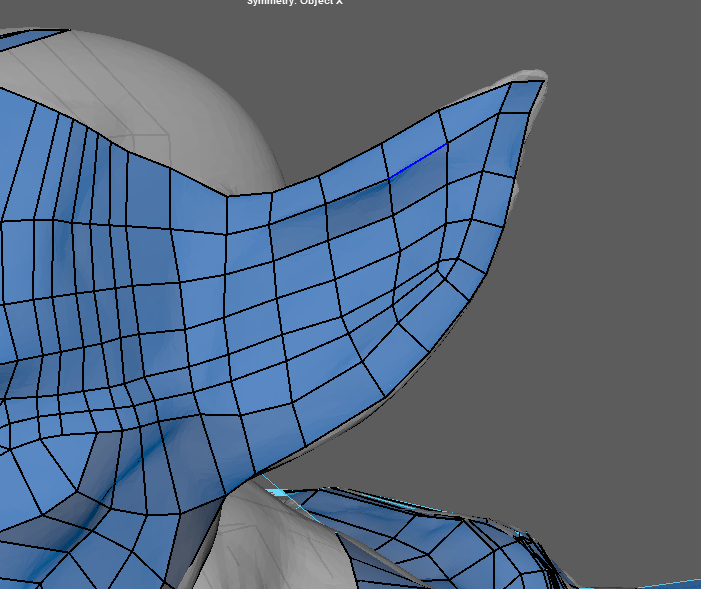
Once the face had been completed I moved onto the ears. Thankfully, the ears were surprisingly easy to do due to keeping the polycount of the face low and simple.
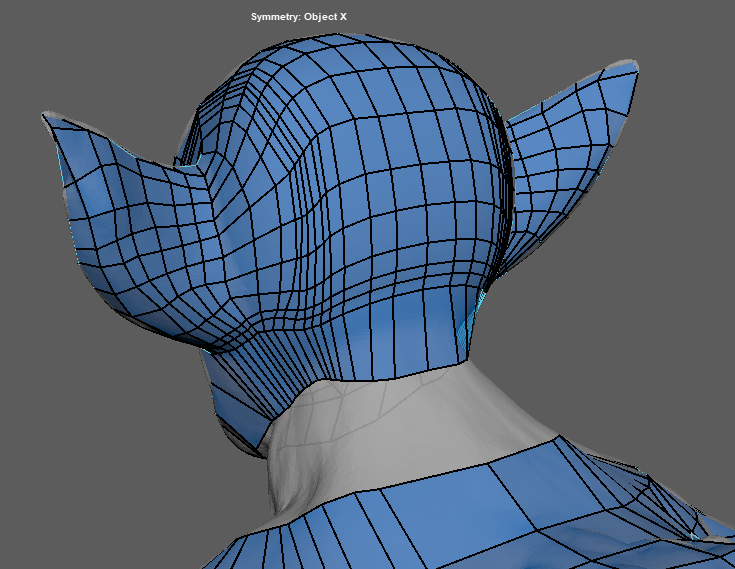
I just continued the edge loops from the face onto the ears and curved them and to the back of the ears and back of the head. Now that the head was fully complete, it was time to connect everything together with the neck.

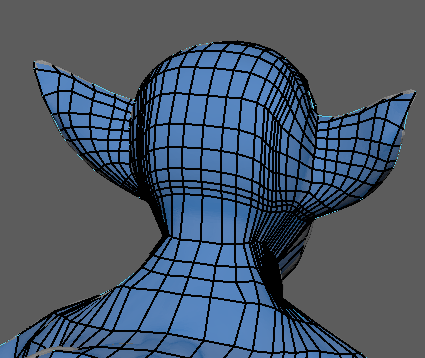
To achieve this, I used the extrude and weld option and connected the middle topology of the head to the middle of the neck. From there I kept doing that and adding edge loops to the head / neck when necessary to complete the fusion of head and body.
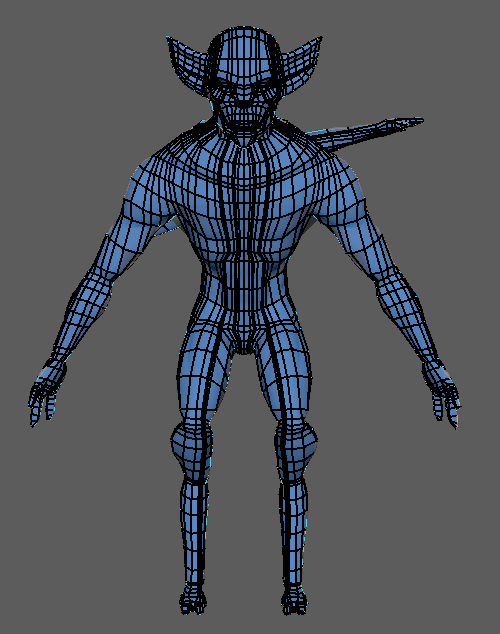

Now that all of the edge loops had been connected, here is how my low poly model turned out. Since this was my first time retopologising apart from a short head exercise in a lab session, I am quite happy with the results. I had to use a couple triangles to complete everything such as on the tips of the fingers but apart from that my topology is relatively clean.
References:
FlippedNormals (2018) How to Retopologize a Head in Maya [Video]. Available online: https://www.youtube.com/watch?v=9N4rG5qHWgk&t=341s [Accessed 01/01/2022].
FlippedNormals (2018) How to Retopologize the Body in Maya [Video]. Available online: https://www.youtube.com/watch?v=_TYOgI9kJtU&t=386s [Accessed 01/01/2022].
FlippedNormals (2014) ZBrush Tutorial – Decimating Your Mesh in ZBrush [Video]. Available online: https://www.youtube.com/watch?v=2NBIsV9cAyo [Accessed 28/12/22].