Basic Outside Blockout (25th December – 7th January):
Beginning Outside Section:
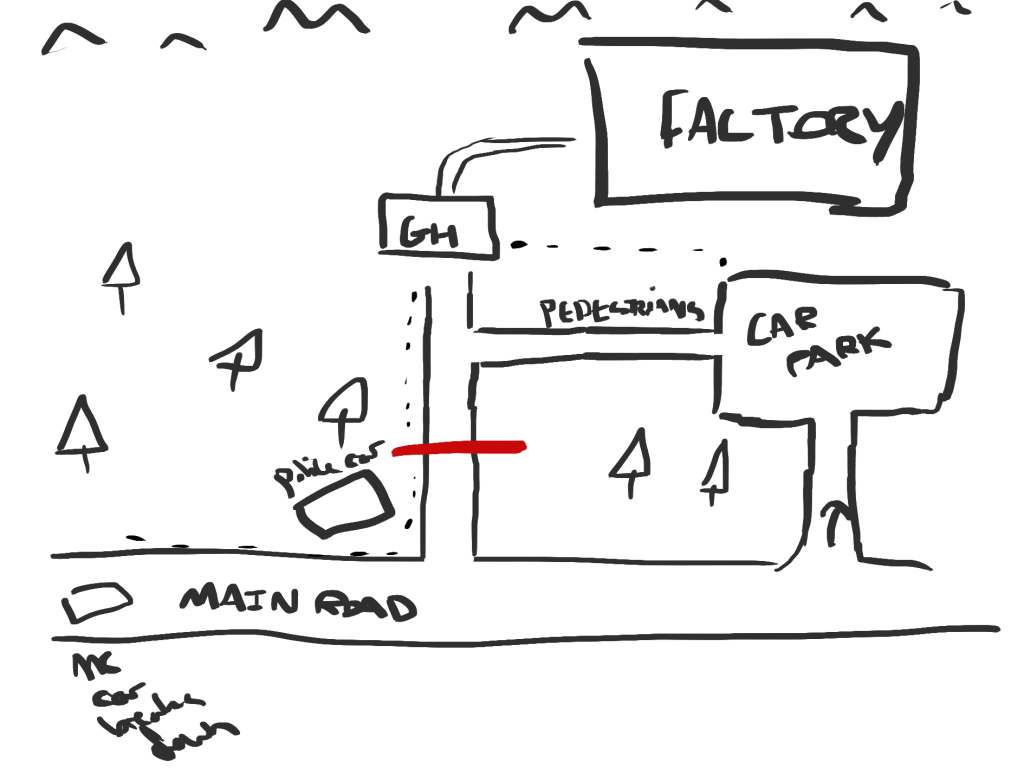
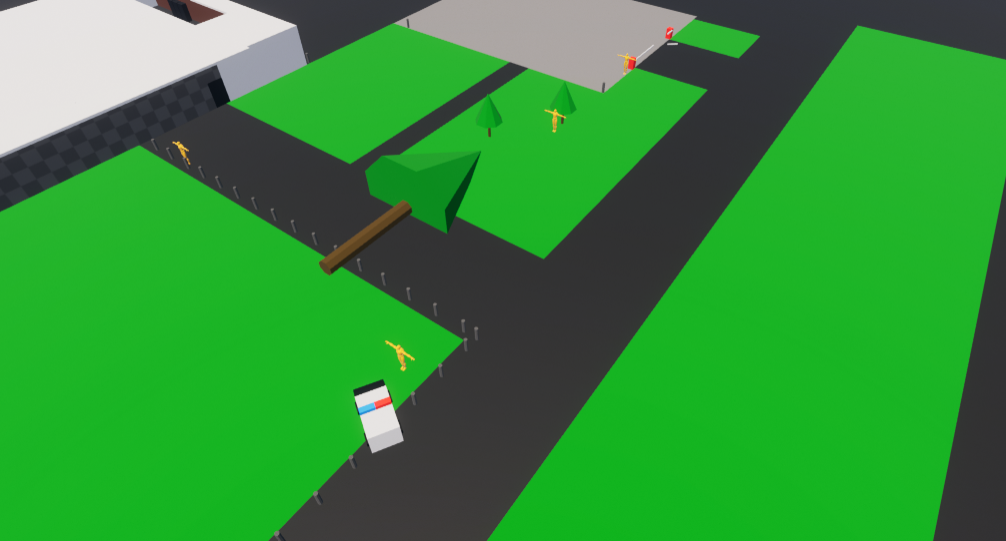
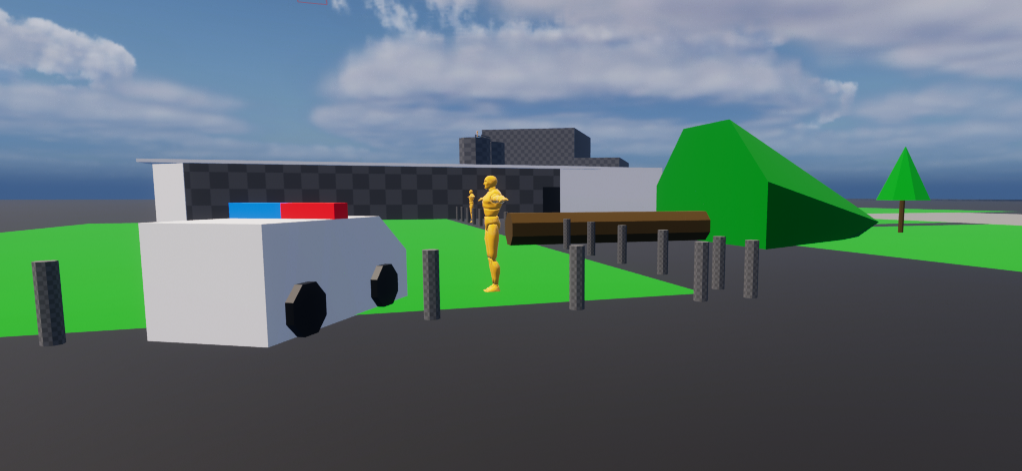
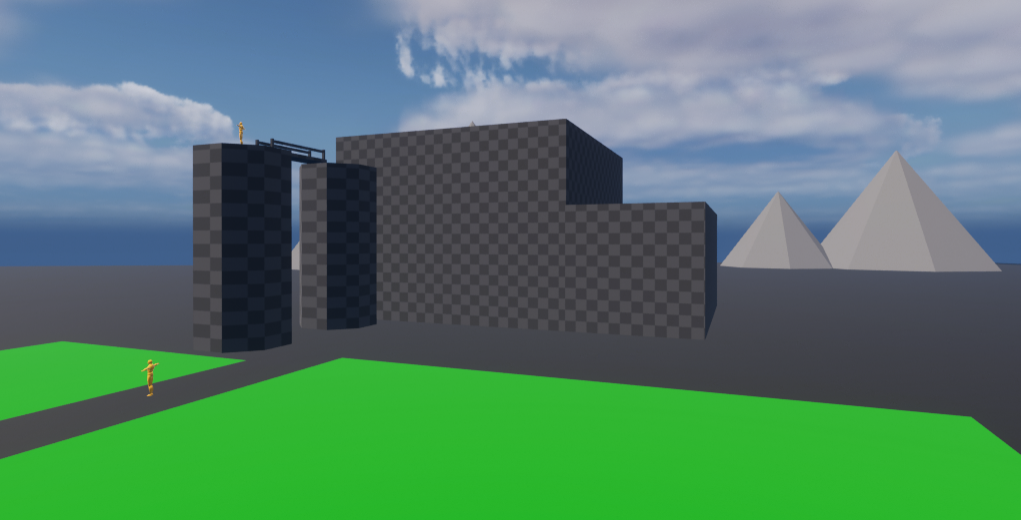
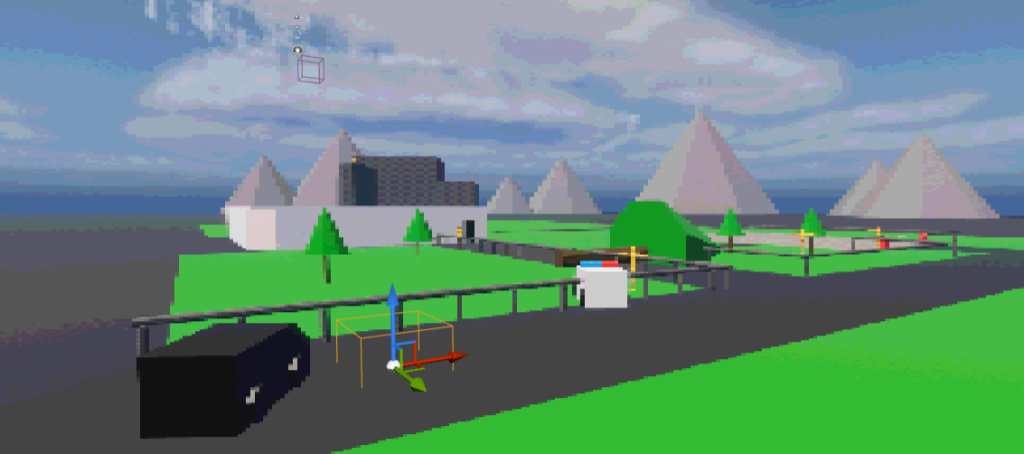
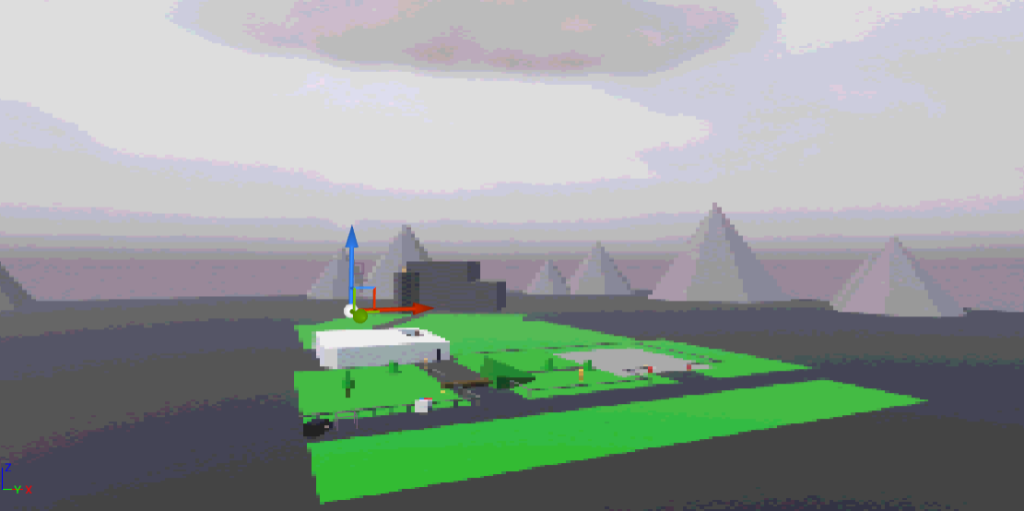
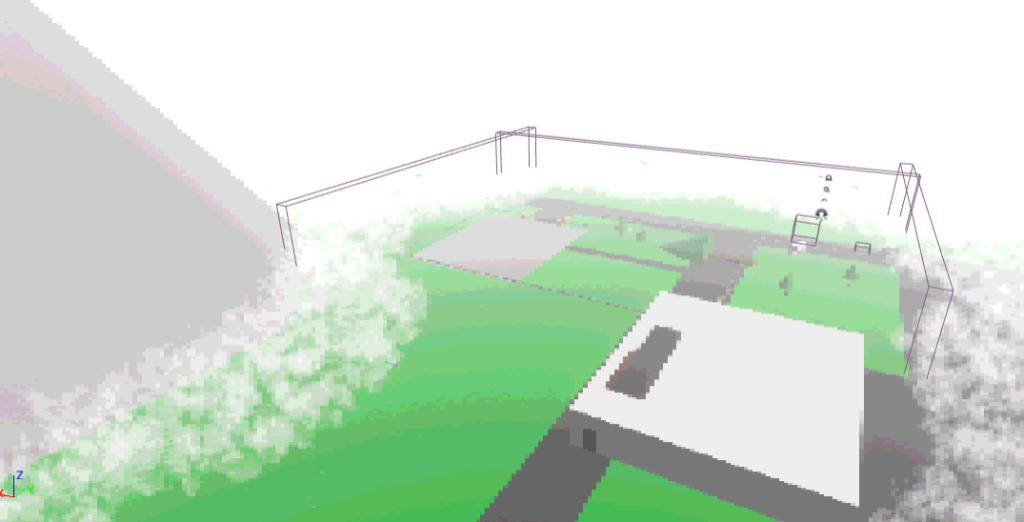
After taking a break from creating level 1, it was time to begin blocking out the outside area. I had already made a top-down sketch of the map with the plan of using it as a guide.
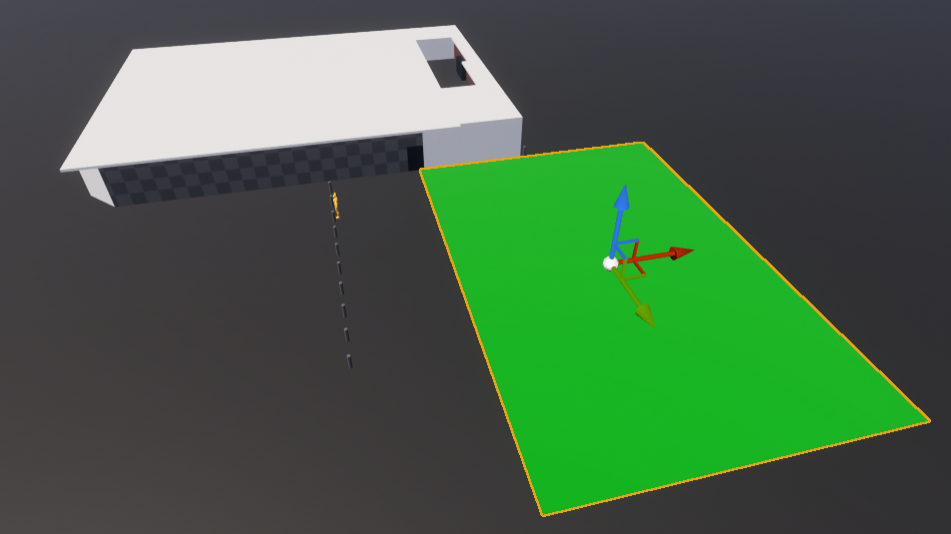
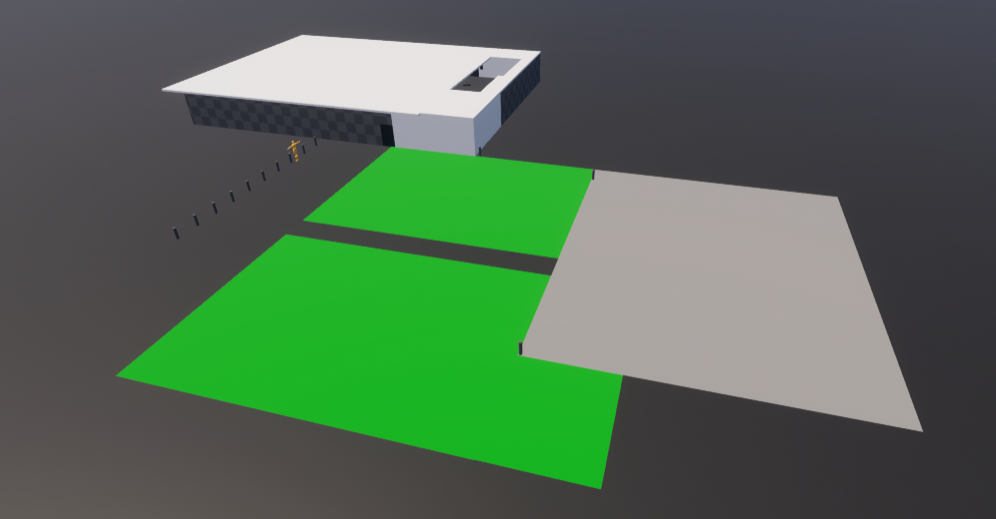
I began by roughly placing grass and concrete to get an outline of the level. A useful feature of Unreal is that the textures on these planes could easily be changed to more detailed versions once the blockout was completed, making for a seamless process when transitioning from the blockout to the final level.
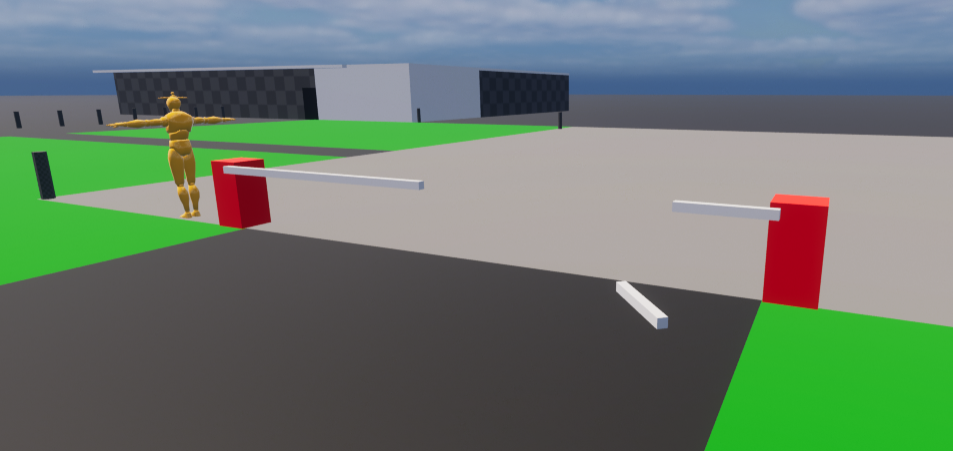
The first outside section of the level should subtly guide the player towards the gatehouse. Therefore, I used techniques such as leading lines (also used in the gatehouse section) to manipulate the player’s subconscious. To be subtle, however, level design techniques should blend in to the environment and so I added a broken car park barrier that points in the direction of the desired destination.
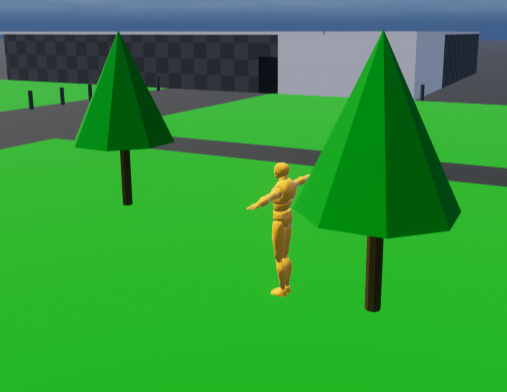
I once again used the Unreal mannequin to gage the correct height and width of objects around the level. Unreal offers a variety of shapes which makes blocking out rough models quick and efficient. These can then be used as reference, in both metrics and placement, by my team when they are creating the finalised models in Blender.
The first section of the outdoors was blocked out, including a large tree that blocks the player’s path – forcing them to go through the carpark and towards the gatehouse.
Landmarks:
Landmarks, also known as weenies, are large objects that can be seen from far away and multiple angles (Shaver, 2018). They attract the player to a certain location as they act as a promise that where they are travelling too is worth it (Sutton, 2019).
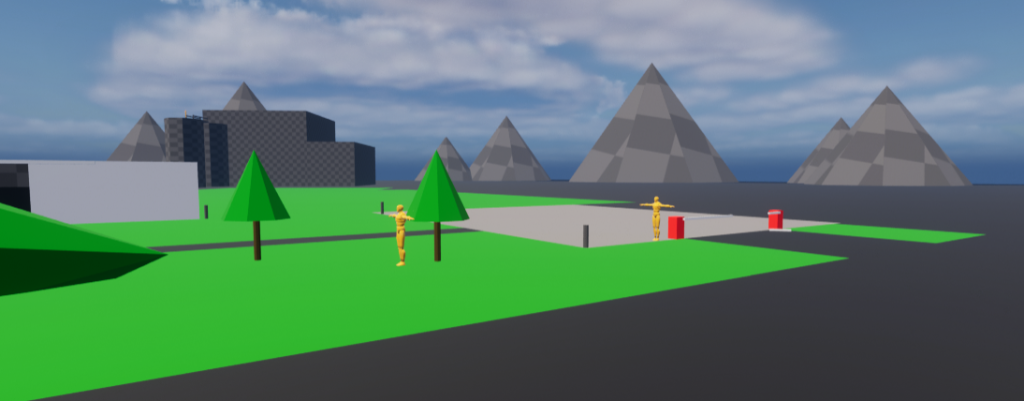
The landmark in my level is the factory, which will be visible to the player before and after entering the gatehouse – drawing them towards the goal.
Background:
Video game backgrounds, both 2D and 3D, help set the stage for the player and create a larger sense of immersion (Simon, 2014).
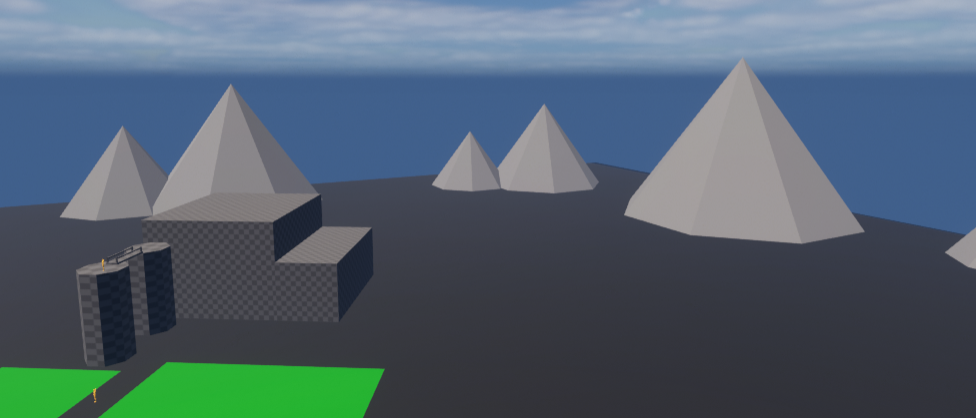
I felt as if the level was a little empty and so I added some mountains in the back of the level. These help add depth and make it more visually engaging for the player.
Finishing The Initial Blockout:
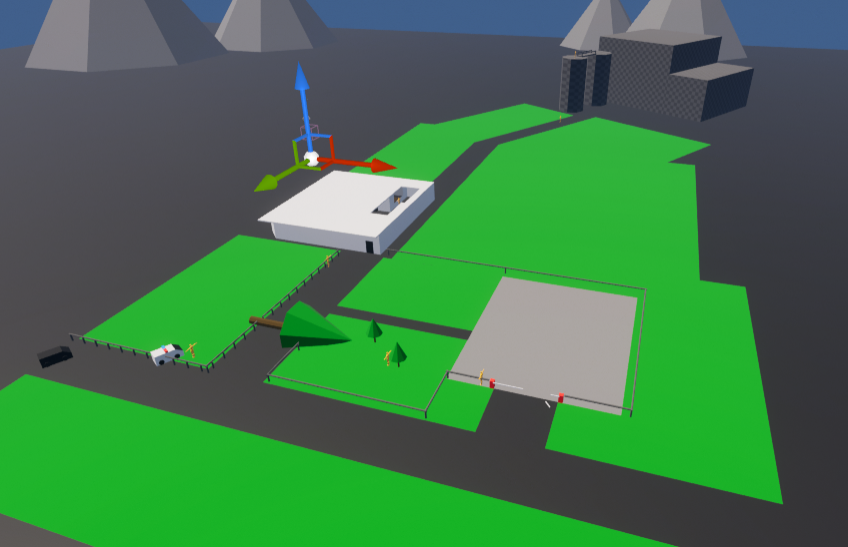
After blocking out the pathway leading up to the factory, the initial blockout was done. The layout of this level may change after testing, but for now I was happy with it.
Creating A PS1 Shader (8th – 14th January):
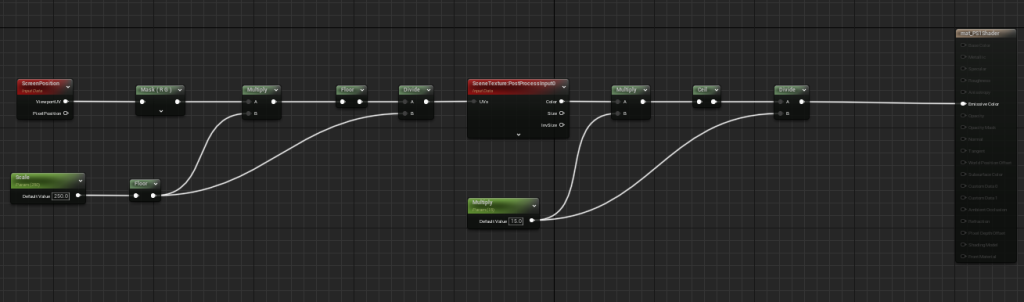
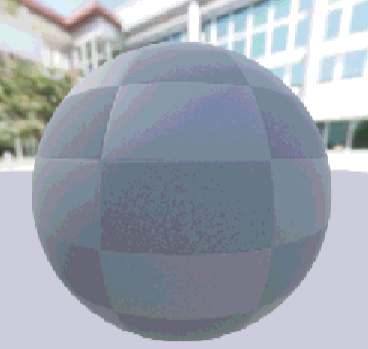
I had very limited experience in creating shaders and so I used a tutorial to aid in creating one that would pixelate the graphics of the game (Ashty, 2022).
Once the shader material had been created, I created an instance that allowed me to experiment with the amount of pixilation without destroying the original material.
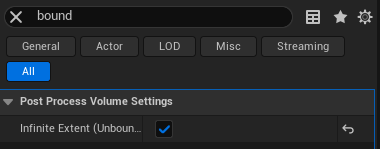
By selecting the infinite extent option, the PS1 shader would be applied throughout the entire level without the need of scaling up the postprocess volume to the size of the level.
I was extremally happy with the results of this shader as it immediately made the game feel like it was from the PS1 era, especially when combined with the low poly blockout objects.
Changing The Sky (15th – 21st January):
Creating The Sky:
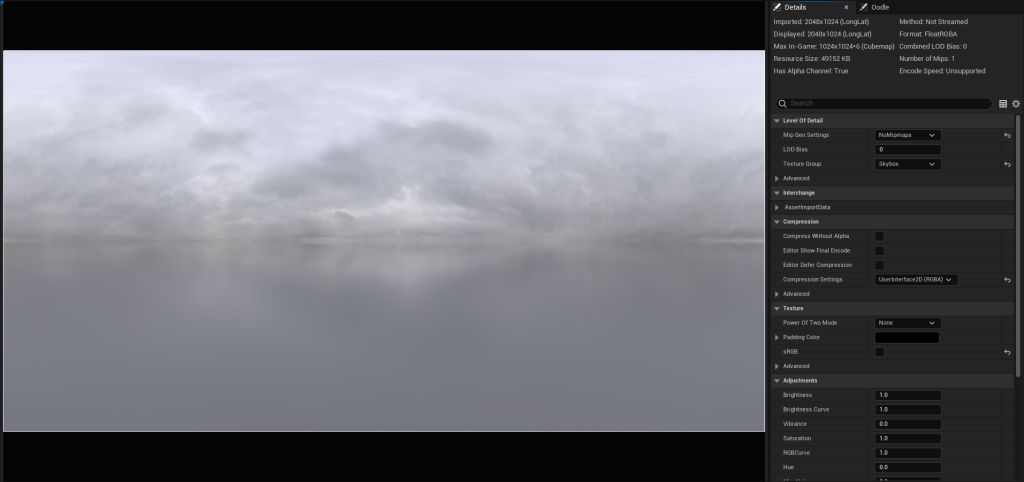
Instead of the default Unreal Engine sky that loads with every new level, I decided that importing a HDRI would make the level look more unique.
Even though the game had a PS1 shader which pixelates everything, I still wanted the HDRI to be of the highest quality possible and so I changed some of the settings – such as the texture group to Skybox and the compression settings to UserInterface2D.
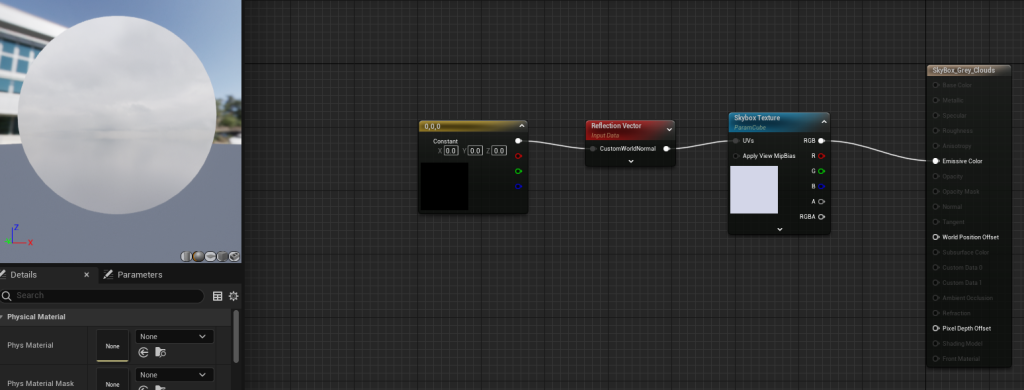
Once the image was correctly set up, I created a material which could be applied to the sky sphere.
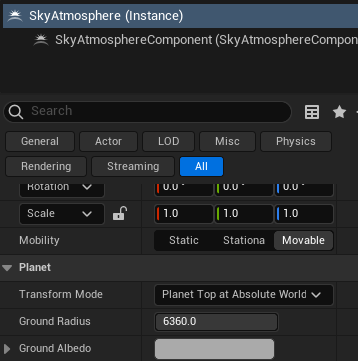
Initially, the HDRI had a large white line at the bottom of the map. Thankfully, the colour of this line could be changed to blend with the colour of the new sky, by adjusting the ground albedo value to a darker shade.
Reason For Sky Choice:
One aspect of Resident Evil 7 (Capcom, 2017) that I have always admired is the opening scene. The first 10 minutes or so of the game are set in a bright area, something which is not usually associated with horror games.
The contrast between the darker environments later in the game and the much lighter area at the start is an interesting tactic. By giving the player a false sense of security in the beginning, Capcom manages to make the darker scenes much more terrifying. Handing the player comfort and then later ripping it away will leave them wishing to be back in the much safer environment at the start.
Perhaps Capcom also use the fact that the player knows the game is in the horror genre to their advantage. By setting the start of the game during the daytime, it may cause a sense of dread for the player as they know that these brighter environments will not last the entire game.
Therefore, I aim to create a similar effect for this game. The first level will be fairly bright, and then once the player enters the factory the environments will switch to a much darker tone.
Creating VFX (15th – 28th January):
Rain:
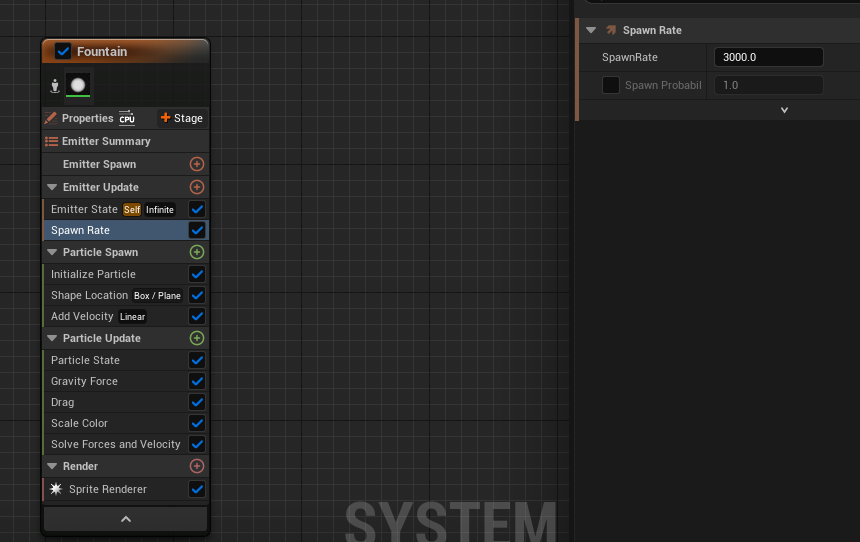
I had created rain before using the Niagara system for a previous project in Unreal Engine. By starting with the fountain preset and changing a few attributes such as the spawn rate and velocity, it was fairly easy to create particles that resembled rain.
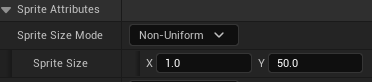
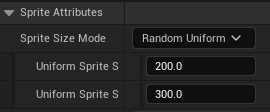
Not all rain particles are the same size and so by randomising the particle size it creates a more realistic look.
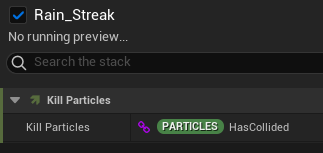
The rain particles were just bouncing off of surfaces and staying on the ground, however. To fix this, I added a kill particles module and set it to activate when the particles have collided with a surface.
I decided to add rain to the first level to help create the cold atmosphere of being on a mountain. It also adds more visual interest to the level, alongside creating different moods depending on the player (Vasudeva, 2018).
Fog:
To create a fog VFX I followed a tutorial as unlike the rain, I had never attempted to make it previously (CodeLikeMe, 2022).
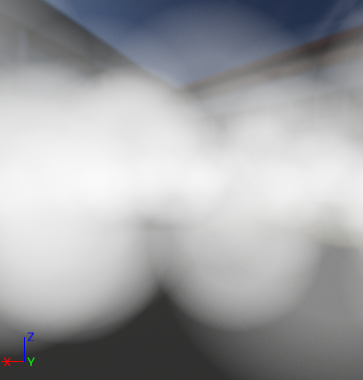
I began by choosing the hanging particulates preset and scaling the particles up. Leaving the VFX like this would probably be recognisable as fog by the player, however I wanted it to be more detailed.
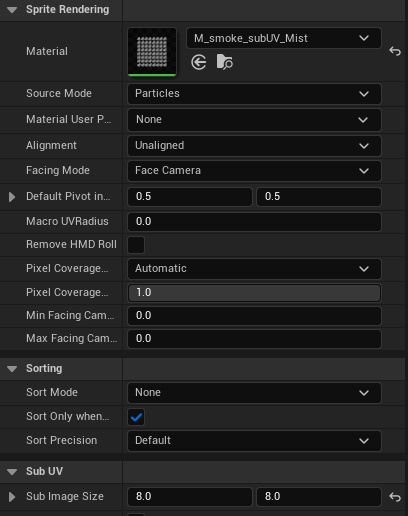
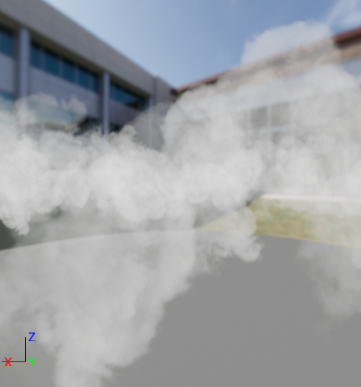
Therefore, I used a smoke sprite sheet that is included in the Unreal Engine content folder.
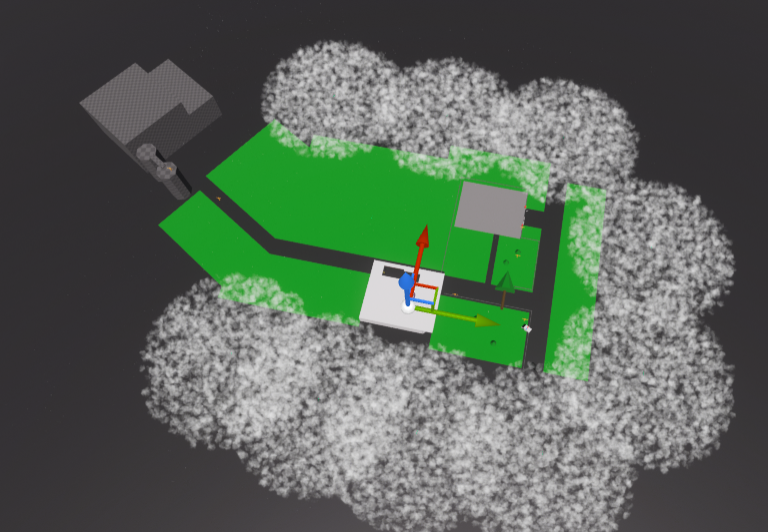
I began placing the fog VFX around the edges of the map, which both created a creepy atmosphere whilst also hiding parts of the map that were incomplete.
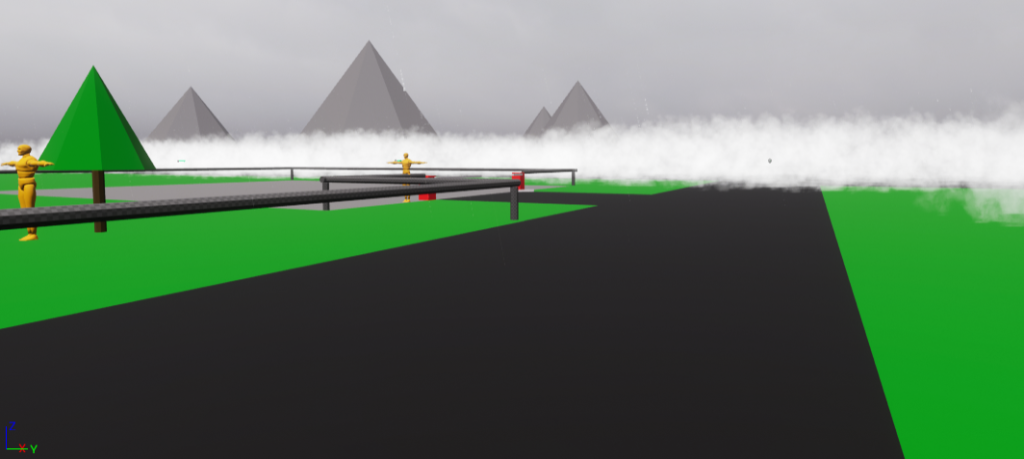
However, I couldn’t help but feel like the fog didn’t particularly fit with the current sky.

When looking at examples of fog in real life, I noticed that it covers the entire atmosphere – not just the ground.
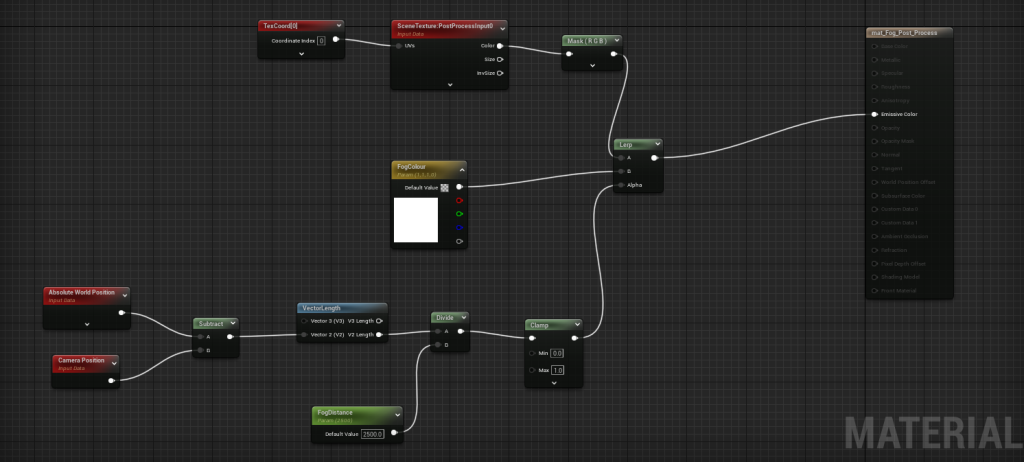
To rectify this, I looked up a tutorial on how to create a Silent Hill fog effect via a post-process material (Stark Crafts, 2022). The fog effect in the original Silent Hill (Konami, 1999) was a product of the technological limitations at the time (Killian, 2024). Whilst it was used to avoid loading too many models at once, it did help create an oppressive and claustrophobic atmosphere as well by utilising the fear of the unknown.
I decided to also keep the fog VFX, combining it with the post-process material to further elevate the cold and creepy mountain atmosphere.
Furthermore, now that the fog had been established, I added some boundaries around the edges of the map to stop the player from wandering too far from the objective. Ideally, these boundaries should be explained through the game’s environment. However, since the fog is so thick on the outskirts of the map, the player will not even be able to tell if they are moving forward or not when walking into an invisible wall.
The only downside of the fog is that it hides the grey sky that I previously worked on, however it does make for a better horror atmosphere.
Sending Level 1 (22nd – 28th January):
Before sending the level to Lennox, I made sure to create a small walkthrough detailing what I had added and what he needs to implement. He needed to add the camera mechanic and puzzle to the gatehouse section, so I made sure to mention where I wanted the cameras to be placed and what the puzzle should roughly include.
Creating video walkthroughs like this is makes explaining features and specific details of the level to my team much easier, rather than just typing messages.
Conclusion:
Overall, I am extremally satisfied with the development of the first level. My job of blocking out the level was completed and so I handed the level over to Lennox to finalise the mechanics and coding.
For level 2, I would like to code some sections myself to showcase my blueprint ability in my portfolio.
Perhaps the only annoyance throughout this process was wasting time on creating a HDRI sky, which cannot be seen due to the fog effect. However, video game development is all about change and adaptation, and, whilst it may have wasted time for this specific project, I still learnt valuable skills throughout the process.